This article describes an easy approach to determining whether or not two files are exactly the same; the purpose of this test being to determine whether or not a file has been edited or tampered with in any way by comparing a file against an original.
The code and sample application demonstrate two methods for determining the status of the file.
The approach indicated is recommended by Microsoft and mention of it was made in Matthew MacDonald's Visual Basic .NET book published by Microsoft Press;
I have found the approach useful in determining whether or not a file has been altered by comparing that suspect file against the original.

Figure 1. The Sample Application in Use
Getting Started
In order to get started, unzip the included project and open the solution in the Visual Studio 2005 environment. In the solution explorer, you should note the following:
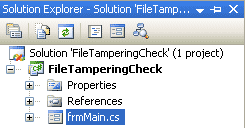
Figure 2. Solution Explorer
As you can see, there is only a single form contained in this Windows application project (frmMain.cs). There were no additional references or resources added to the project and only the default settings are necessary to support the code used.
The design of the form is simple, there are two sets of controls (a text box and a button) used in conjunction of an Open File Dialog to search for and load two files. One file is the source file, and the second is the file that will be compared against the source. Two additional buttons are added to the form and are used to kick off either of the two tests that will be run against the two selected files. Lastly, there is a button used to terminate the application:
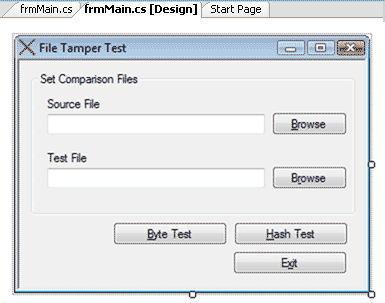
Figure 3. The Main Form Designer
The Code: Main Form (frmMain.cs)
The main form class includes two imports which are necessary to support the sample application:
using System.Security.Cryptography;
using System.IO;
Cryptography exposes the Hash Algorithm class which allows the application to convert the content of a file stream or byte array into a hash algorithm which in turn may be used as the basis for a comparison between the target and selected file. This approach will be sensitive to even the most minor change (such as removing or adding a single space).
IO is added to allow for the manipulation of the files themselves.
The first block of code in the application is used to terminate the application whenever the user clicks the "Exit" button:
public partial class frmMain
{
private void btnExit_Click(System.Object sender, System.EventArgs e)
{
Application.Exit();
}
Following the exit button click event handler, the next two code blocks are used to handle the click events for the browse buttons used on the form. Since the two handlers are roughly the same, I will only show one of them here:
private void btnBrowseSrc_Click(System.Object sender, System.EventArgs e)
{
OpenFileDialog1.Title = "Open File";
OpenFileDialog1.Filter = "Files (*.*)|*.*";
if (OpenFileDialog1.ShowDialog() == System.Windows.Forms.DialogResult.Cancel)
{
return;
}
string sFilePath = OpenFileDialog1.FileName;
if (System.IO.File.Exists(sFilePath) == false)
{
sFilePath = "";
return;
}
else
{
txtSourceFile.Text = sFilePath;
}
}
This is all pretty common, the Open File Dialog is configured to display the title "Open File" and the filter is set to display all files. If the user selects the cancel button, the subroutine will exit. When the user selects a file through the dialog, the subroutine checks to see if the file exists, and if it does, it sets the text property of the appropriate text box to display the path to the file.
The next block of code is used to execute the hash algorithm based test of the two selected files:
private void btnTest_Click(System.Object sender, System.EventArgs e)
{
HashAlgorithm myHash;
myHash = HashAlgorithm.Create();
if (txtTestFile.Text == string.Empty || this.txtSourceFile.Text == string.Empty)
{
MessageBox.Show("Set all form fields prior to initiating a test", "Missing Form Data", MessageBoxButtons.OK);
}
FileStream fs1 = new FileStream(txtTestFile.Text, FileMode.OpenOrCreate);
byte[] fs1Bytes = new byte[fs1.Length + 1];
fs1.Read(fs1Bytes, 0, (int)fs1.Length);
byte[] arr1 = myHash.ComputeHash(fs1Bytes);
fs1.Close();
FileStream fs2 = new FileStream(txtSourceFile.Text, FileMode.OpenOrCreate);
byte[] fs2Bytes = new byte[fs2.Length + 1];
fs2.Read(fs2Bytes, 0, (int)fs2.Length);
byte[] arr2 = myHash.ComputeHash(fs2Bytes);
fs2.Close();
if (BitConverter.ToString(arr1) == BitConverter.ToString(arr2))
{
MessageBox.Show("The file examined has not been tampered with.", "Hash Test Passed");
//display comparison
MessageBox.Show("Original Hash: " + Environment.NewLine + BitConverter.ToString(arr1) + Environment.NewLine
+ "Test Hash: " + Environment.NewLine + BitConverter.ToString(arr2), "Hash Test Results");
}
else
{
MessageBox.Show("The file examined has been tampered with.", "Hash Test Failed");
//display comparison
MessageBox.Show("Original Hash: " + Environment.NewLine + BitConverter.ToString(arr1) + Environment.NewLine
+ "Test Hash: " + Environment.NewLine + BitConverter.ToString(arr2), "Hash Test Results");
}
}
The subroutine starts by creating an instance of the Hash Algorithm class called "myHash". Next, the subroutine validates that there is text contained in each of the two text boxes used to contain the paths to the source and test files to be used in the evaluation.
The next bit of code is as follows:
FileStream fs1 = new FileStream(txtTestFile.Text, FileMode.OpenOrCreate);
byte[] fs1Bytes = new byte[fs1.Length+ 1];
fs1.Read(fs1Bytes, 0, (int) fs1.Length);
fs1.Close();
This code creates a file stream and passes the path to the test file and file mode to that file stream object. A byte array is created and set to the length of the file stream and then populated with the content of the file stream. A new byte array used to contain value returned from the hash algorithm's compute hash method is then created and passed the byte array generated directly from the file stream. Lastly, the file stream is closed. This same process is then applied to the source file in the next bit of code.
When the hash for each of the files has been generated, the subroutine then uses the System.BitConverter to compare to the two byte arrays. If the arrays are identical, the user is informed that the file has not been tampered with or changed, if they do not match, the user is informed of the mismatch and the two byte arrays are displayed to the user to confirm the difference between the two arrays. Any minor change to the files will result in a completely different hash.
The next subroutine is used to handle the Byte Test button click event; that code is as follows:
private void btnByteCompare_Click(System.Object sender, System.EventArgs e)
{
FileStream fs1 = new FileStream(txtTestFile.Text, FileMode.OpenOrCreate);
byte[] fs1Bytes = new byte[fs1.Length+ 1];
fs1.Read(fs1Bytes, 0, (int) fs1.Length);
fs1.Close();
FileStream fs2 = new FileStream(txtSourceFile.Text, FileMode.OpenOrCreate);
byte[] fs2Bytes = new byte[fs2.Length+ 1];
fs2.Read(fs2Bytes, 0, (int) fs2.Length);
fs2.Close();
int i = 0;
for (i = 0; i <= fs1Bytes.Length - 1; i++)
{
if (!System.Convert.ToBoolean(fs1Bytes[i] == fs2Bytes[i]))
{
MessageBox.Show("The file examined has been tampered with at position " + i.ToString(), "Byte Test Failed");
return;
}
}
MessageBox.Show("The file examined has not been tampered with.", "Byte Test Passed");
}
This subroutine starts out by opening a file stream for each of the two files (source and test) and converts the content of the two files to byte arrays. Once this is done, the subroutine executes a loop to do a byte by byte comparison between the two files. If the files match from beginning to end, the user will be told that the file has not been tampered with; if the files do not match as any position in the byte array, the user will be told at what position the first mismatch occurred.
Testing the Application
To prepare for the test, create a file in notepad, type some text into it, and save it on the file system. Next, create an exact duplicate of the file. Use these two files as the source and test files used by the application.
Build and launch the application and use the browse buttons to load the two files created per the last paragraph. Once the two files have been set, click on the "Hash Test" button. You should see this result displayed:
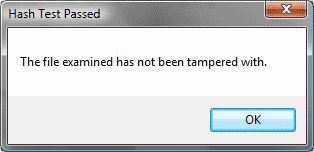
Figure 4. Hash Test Results for Identical Files
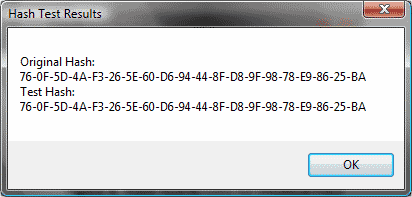
Figure 5. Original and Test Hash Comparison
Dismiss the dialog boxes by clicking OK on each of them. Now click on the Byte Test button; the results displayed should match this example:

Figure 6. Byte Test Results for Two Identical Files
Now, open the duplicate file in notepad and edit one letter in the text. In the example, my text file contained the string shown in Figure 7. In that string, I replaced the "b" in boat with a "g" to turn boat into goat. Save the file and repeat the test.

Figure 7. Notepad with Sample Text
When the test is repeated, the results for the hash test will be as follows:
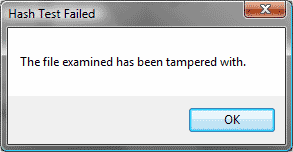
Figure 8. Hash Test Results after Edit of Test File
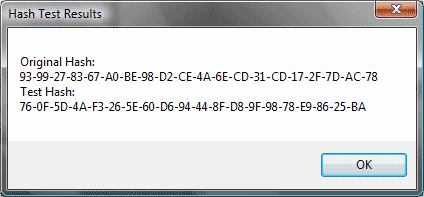
Figure 9. Different Hash for Original and Test Files After Edit of Test File

Figure 10. Byte Test Failure Pointing to Position of Mismatch
As can be seen from the results, the hash returned by the test file after making a single character change is entirely different from the original and the mismatch is easily detected by the comparison. Similarly, when performing the byte array test, the position of failure was easily trapped by making the byte by byte comparison of the two files. Position 82 in this case is the position where the "B" in boat was swapped for the "G" in goat.
Summary
This example was intended to show a couple of ways in which two files may be compared in order to determine whether or not they are identical. While this example only shows two approaches to testing the files, there are several variations to the approach that can be applied, for example, the hash algorithm class ComputeHash method will perform the same operation directly on the file stream without first converting it to byte array.
No comments:
Post a Comment